
 Tweet
Tweet
Hello everyone -
I need some help or I'm going to start drinking heavier than normal.
The rover in question is Grover, my '63 SIIa 88. I'm in the middle of rebuilding all four hubs and decided to start with the rear ones since they should be "theoretically" easier.
Today I attempted to reinstall both hubs and everything came to a screeching halt!
Let me start at the beginning so you can see the steps taken to get to this point.
All of the stub axles were cleaned with the rust removed and those areas that could be painted were.
The distance pieces were removed and replaced. These were pressed on an auto shop (it took right at 8.5 tons of pressure to do them). Unfortunately the very first one was installed upside down. I gave the shop owner the stub axle with the distance piece on it facing the correct way but for some reason he took it off when he made an adjustment with the press and didn't put it on the right way. I was prepping the next stub axle and didn't notice it till it was too late. So, he removed it for me but damaged it in the process. I can't complain too much because he pressed on 9 other Rover parts for me for free. The one to be replaced I'll use the hot/cold method. I did not apply any silicone to the stub axle since the green bible said pressing them on creates a seal but it will be added to the one I do - just to be safe.
The old bearings and races were also replaced. I did check to make sure the races were completely seated by sight, touch and using an inspection mirror as well. All four of the bearings were packed with wheel bearing grease and checked for ease of bearing movement as well as fit in the races.
The oil seals were then installed facing the correct way. These are the standard rubber/plastic ones that most people seem to use. I did not use any silicone for two reason - 1) several Series mechanics told me that with the new seals it was not necessary, just add a little oil or grease to aid in instillation; 2) - I didn't want to take the chance of silicone coming loose and getting in the roller bearings.
Before installing the hubs I did make sure there was a thin layer of grease placed on the race and face of each distance piece.
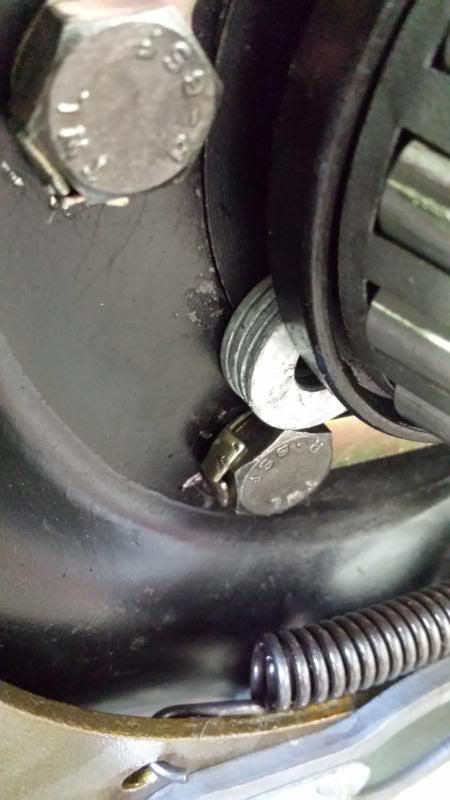
Now for the problem...I CAN NOT get the end of the hub & stud part (the part housing the oil seal) to mate up with the stub axle/brake back plate!!! There is a gap, a little less than 1/4", between the two parts!!!
Is there a trick to doing this? I've tried pushing on them but they do not budge. I was even tempted to take a mallet to them but was afraid of ruining the oil seals.
I have read, and reread, the green bible as well as the Haynes manuals to see if they mentioned a method to do this and found nothing; granted, I could have been looking in the wrong section of the green bible but doubt it. I have also read through several posts on different forums trying to find an answer and the closest thing so far deals with the central nut, seating and loading the bearings and measuring float.
Some of the posts indicated that tightening the first nut is how you mate the hub & stud part to the stub axle and brake back plate.
Also - I am using the 2" nut spanner as well.
What am I doing wrong!!!! ??? :thud
Here are some pics so you can have a look-see.
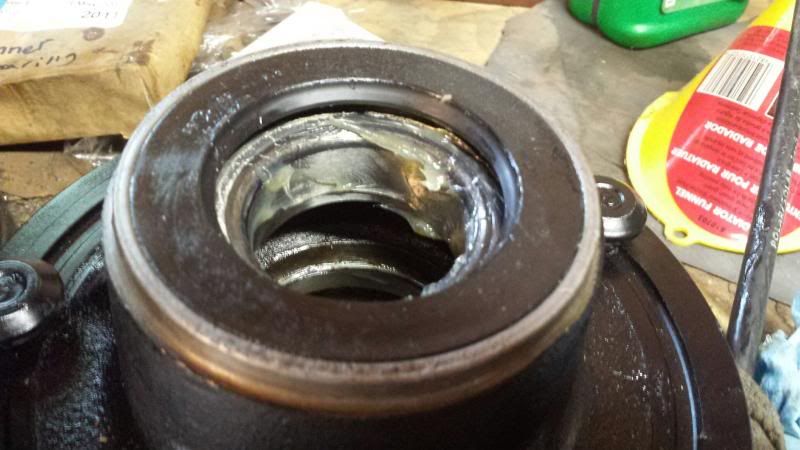
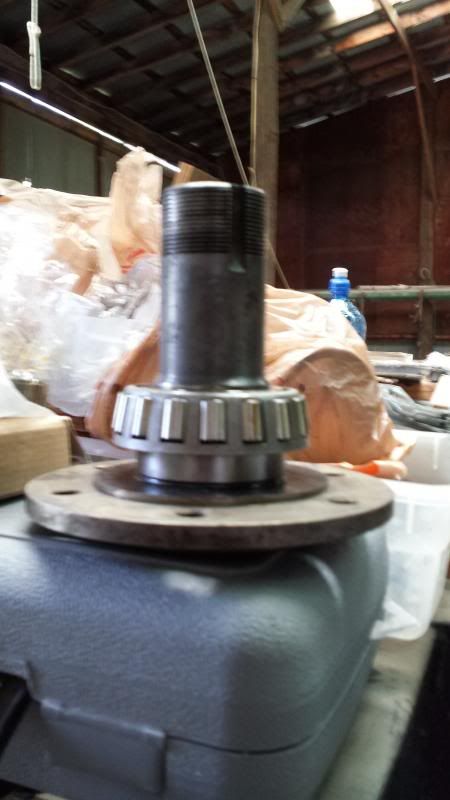
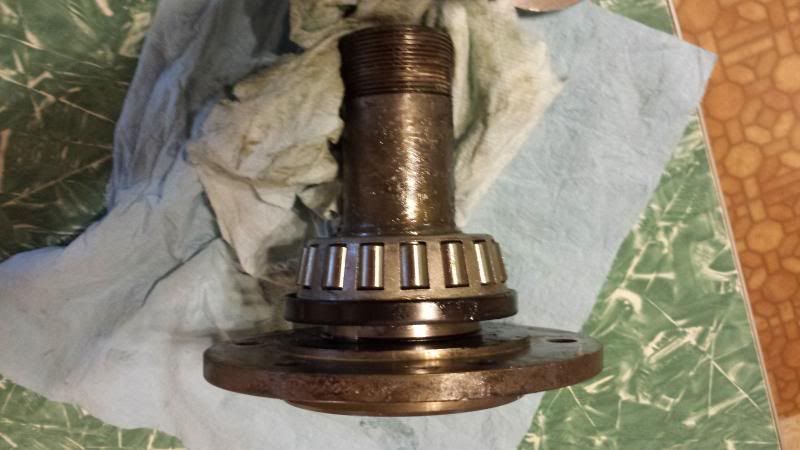
Up first is the hub & stud part with the oil seal in place you can sort of see the inner bearing there as well.
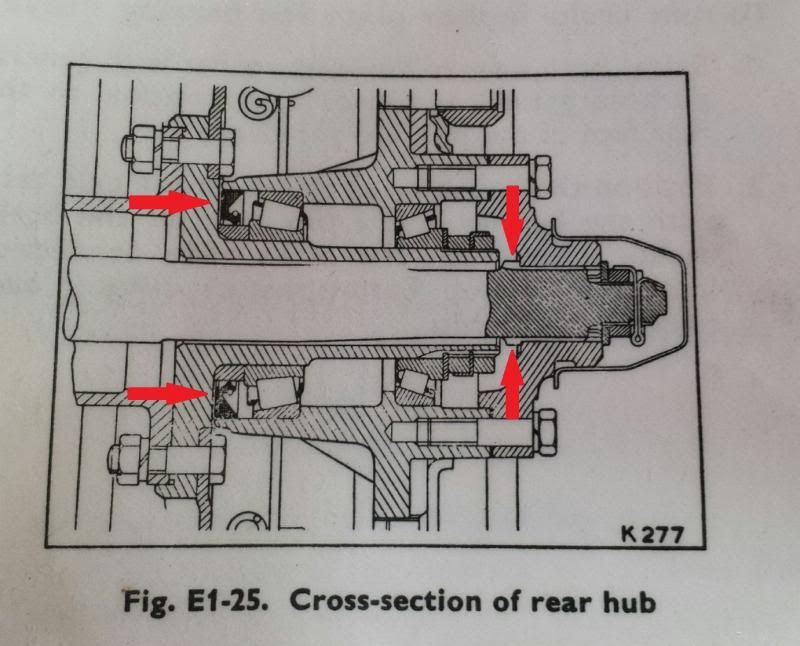
The next pic is a cross section view from the green bible. The set of red arrows on the left show how the hub & stub part mates up with the stub axle/brake back plate. The set of red arrows on the right point to the spot where the axle half shaft connects to the driving flange - this will be talked about later down the line.
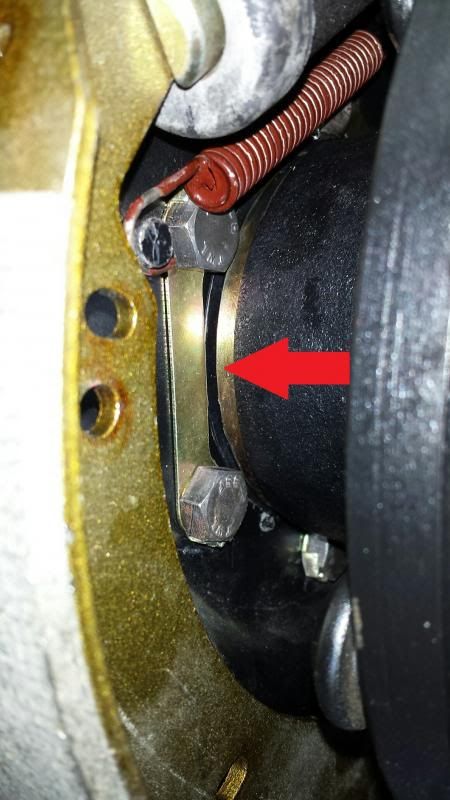
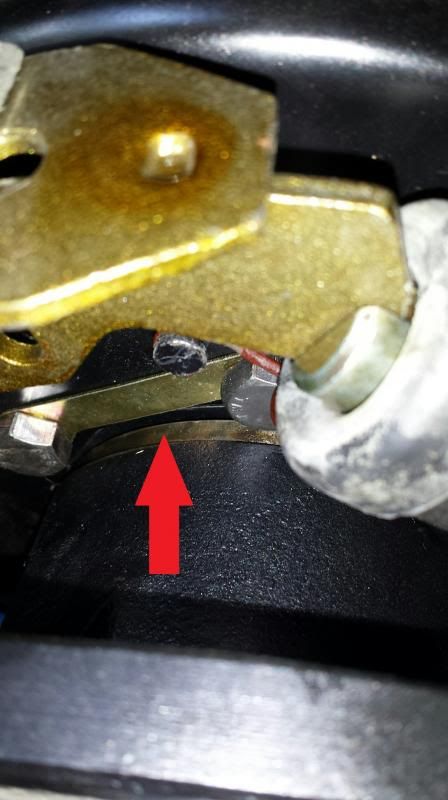
The next three pictures are an attempt to show you all the gap - I hope you all can see it clearly.
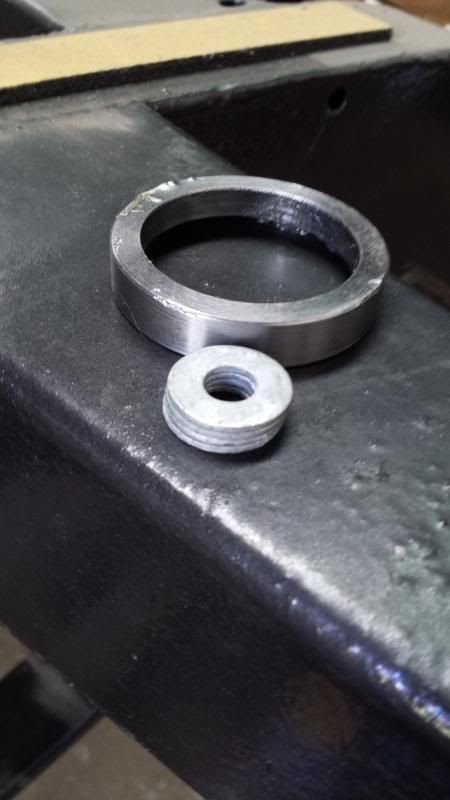
The last couple of pics deal with the axle half shaft and the driving flange.
The first one shows the axle half shaft seated all the way into the differential. Notice how little sticks out of the driving flange - there is no way the washer and castle nut will seat properly.
This last picture shows the axle half shaft in it's proper place with its shoulder up against the inner side of the drive shaft. There is also enough sticking out that the washer and castle nut will seat properly.
HELP!!!!
I need some help or I'm going to start drinking heavier than normal.
The rover in question is Grover, my '63 SIIa 88. I'm in the middle of rebuilding all four hubs and decided to start with the rear ones since they should be "theoretically" easier.
Today I attempted to reinstall both hubs and everything came to a screeching halt!
Let me start at the beginning so you can see the steps taken to get to this point.
All of the stub axles were cleaned with the rust removed and those areas that could be painted were.
The distance pieces were removed and replaced. These were pressed on an auto shop (it took right at 8.5 tons of pressure to do them). Unfortunately the very first one was installed upside down. I gave the shop owner the stub axle with the distance piece on it facing the correct way but for some reason he took it off when he made an adjustment with the press and didn't put it on the right way. I was prepping the next stub axle and didn't notice it till it was too late. So, he removed it for me but damaged it in the process. I can't complain too much because he pressed on 9 other Rover parts for me for free. The one to be replaced I'll use the hot/cold method. I did not apply any silicone to the stub axle since the green bible said pressing them on creates a seal but it will be added to the one I do - just to be safe.
The old bearings and races were also replaced. I did check to make sure the races were completely seated by sight, touch and using an inspection mirror as well. All four of the bearings were packed with wheel bearing grease and checked for ease of bearing movement as well as fit in the races.
The oil seals were then installed facing the correct way. These are the standard rubber/plastic ones that most people seem to use. I did not use any silicone for two reason - 1) several Series mechanics told me that with the new seals it was not necessary, just add a little oil or grease to aid in instillation; 2) - I didn't want to take the chance of silicone coming loose and getting in the roller bearings.
Before installing the hubs I did make sure there was a thin layer of grease placed on the race and face of each distance piece.
Now for the problem...I CAN NOT get the end of the hub & stud part (the part housing the oil seal) to mate up with the stub axle/brake back plate!!! There is a gap, a little less than 1/4", between the two parts!!!
Is there a trick to doing this? I've tried pushing on them but they do not budge. I was even tempted to take a mallet to them but was afraid of ruining the oil seals.
I have read, and reread, the green bible as well as the Haynes manuals to see if they mentioned a method to do this and found nothing; granted, I could have been looking in the wrong section of the green bible but doubt it. I have also read through several posts on different forums trying to find an answer and the closest thing so far deals with the central nut, seating and loading the bearings and measuring float.
Some of the posts indicated that tightening the first nut is how you mate the hub & stud part to the stub axle and brake back plate.
Also - I am using the 2" nut spanner as well.
What am I doing wrong!!!! ??? :thud
Here are some pics so you can have a look-see.
Up first is the hub & stud part with the oil seal in place you can sort of see the inner bearing there as well.
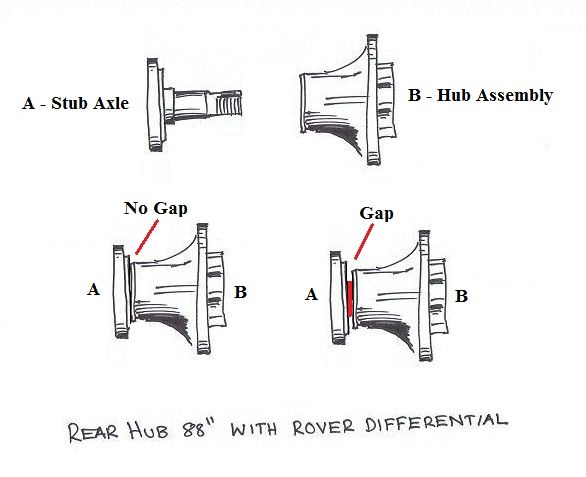
The next pic is a cross section view from the green bible. The set of red arrows on the left show how the hub & stub part mates up with the stub axle/brake back plate. The set of red arrows on the right point to the spot where the axle half shaft connects to the driving flange - this will be talked about later down the line.
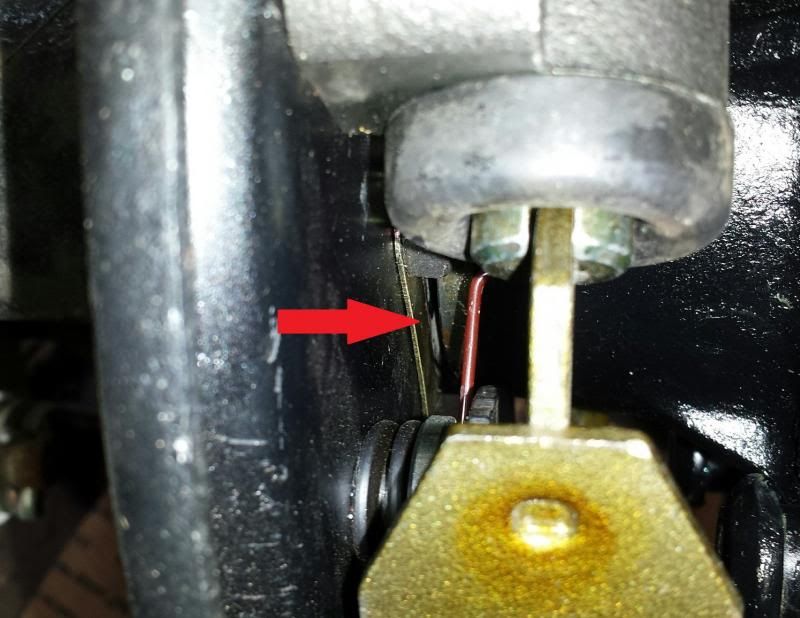
The next three pictures are an attempt to show you all the gap - I hope you all can see it clearly.
The last couple of pics deal with the axle half shaft and the driving flange.
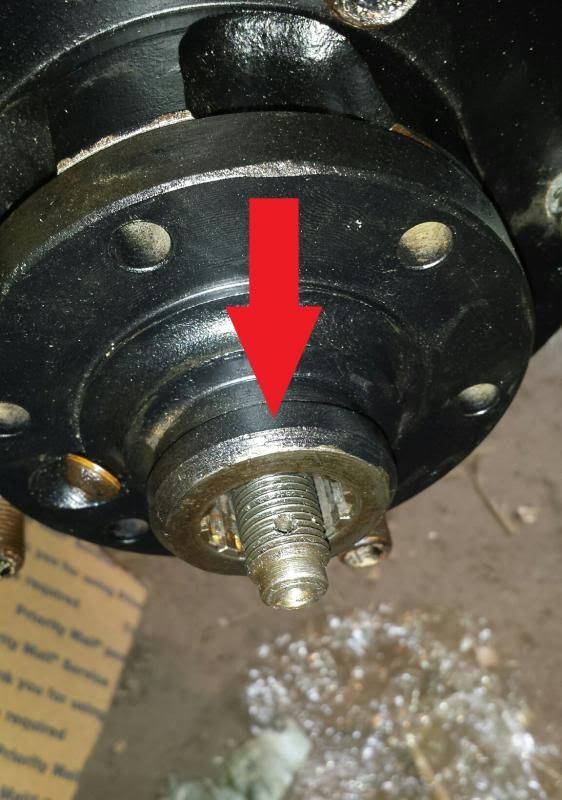
The first one shows the axle half shaft seated all the way into the differential. Notice how little sticks out of the driving flange - there is no way the washer and castle nut will seat properly.
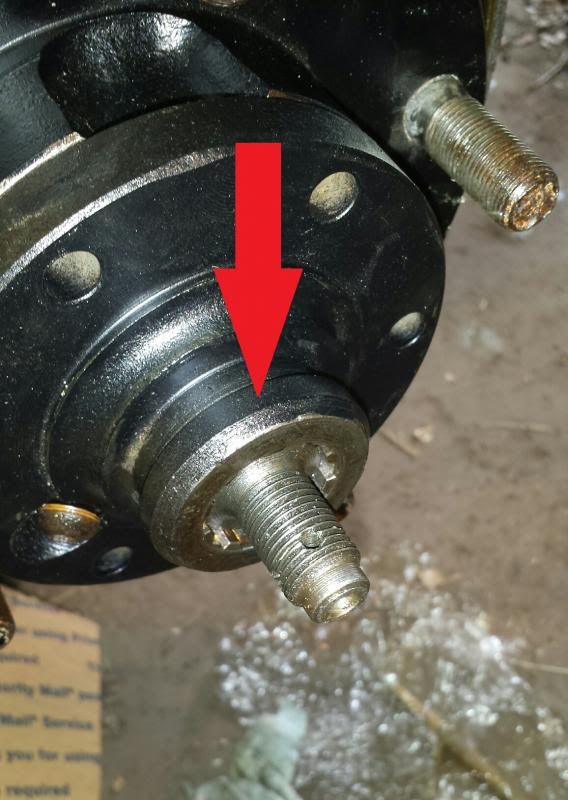
This last picture shows the axle half shaft in it's proper place with its shoulder up against the inner side of the drive shaft. There is also enough sticking out that the washer and castle nut will seat properly.
HELP!!!!


Comment