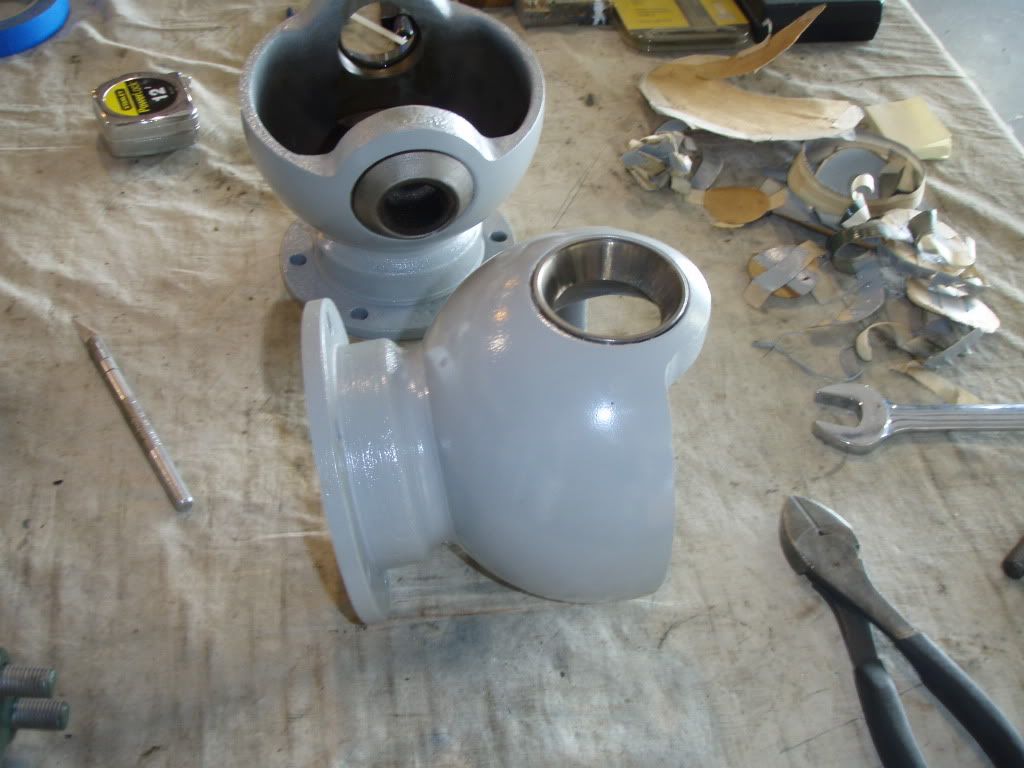
Can I save these swivel balls by using some JB weld and then powder coating them? or just powder coating them?
I just got the roamoffroad / timm cooper disc brake conversion, so should I do it right and buy new ones or does the repair actually work?

 Low Range
Can I save these swivel balls by using some JB weld and then powder coating them? or just powder coating them?
I just got the roamoffroad / timm cooper disc brake conversion, so should I do it right and buy new ones or does the repair actually work?
 Low Range
Personally if they were mine I'd replace them with new.
 Overdrive
The damage is in a working area of the swivel balls. The epoxy & powder coat 'repair' would be temporary at best. If you were on a tight budget and just trying to get the truck back on the road I would say go for it. Seeing how you are doing the Timm Cooper discs, you are obviously not going this route.
I would buy new ones. There are shops that can repair & re-chrome the swivel balls, but they may have trouble re-establishing the correct profile in the damaged areas (especially is they try to smooth the repaired area by hand) . To avoid any possible issues, you may just want to use new ones.
 Overdrive
I've seen a lot worse. The ones on my '65 were like that and I repaired them with JB weld or some other epoxy in 1997. It is still holding up fine. I was on a slim budget back then and did what I could to get by. If you have the $ and it isn't too much of a hardship buy new.
 3rd Gear
Try the JB Weld and see if you can sand it down smooth and to the correct shape. Cant really get much worse than they are now. Powder coating will not help you fill in the pitting, it is very thin stuff. After many layers of PC you can build up a surface, so i suppose you could mask off the good areas and PC the bad spots a bunch of times to see if you get any thickness then feather the edges. Not sure if that would work in reality but it does in my brain. If you do PC anything on swivels BAKE FIRST! to cook out all the crap. I did not to this thinking i would end up with a shinny swivel out of the oven, only to find all the sneaky oil you cant see or clean works its way out and all over your powder. Oh and take out your RALCO bushing (learned hard way) I had very minor pitting on my swivels on top and bottom outside the working area. Filled and sanded with JB then powder coated and they still look real nice. Gators would not be a bad idea after if you do PC, i can see a rock chip ruining a lot of work.
1970 Series IIA 109 EX-MOD
1971 Series IIA 109 EX-MOD
1982 Mercedes 300TD
1989 RRC
1993 D110
1994 RRC LWB
1995 RRC SWB Brooklands Edition
1995 RRC LWB
1995 RRC LWB
1995 Disco
1996 GMC 2500 Suburban
1996 Disco
1997 Disco
2001 RR P38
2005 LR3 HSE
2006 RR HSE
Low Range
Thanks for the information Guys! I decided to purchase new swivel balls.
 5th Gear
What's your recipe for this? How hot and how long?Originally Posted by masonater

You've done us all a favor by allowing us to learn from your experience.
 4th Gear
Here is a write up, possibly he used this recipe?
http://www.lrfaq.org/Series/Drivetrain.SwivelBalls.html
04 Disco, Gone-Disco died & so did mine
'72 S3 88 - Leakey & Squeaky
3rd Gear
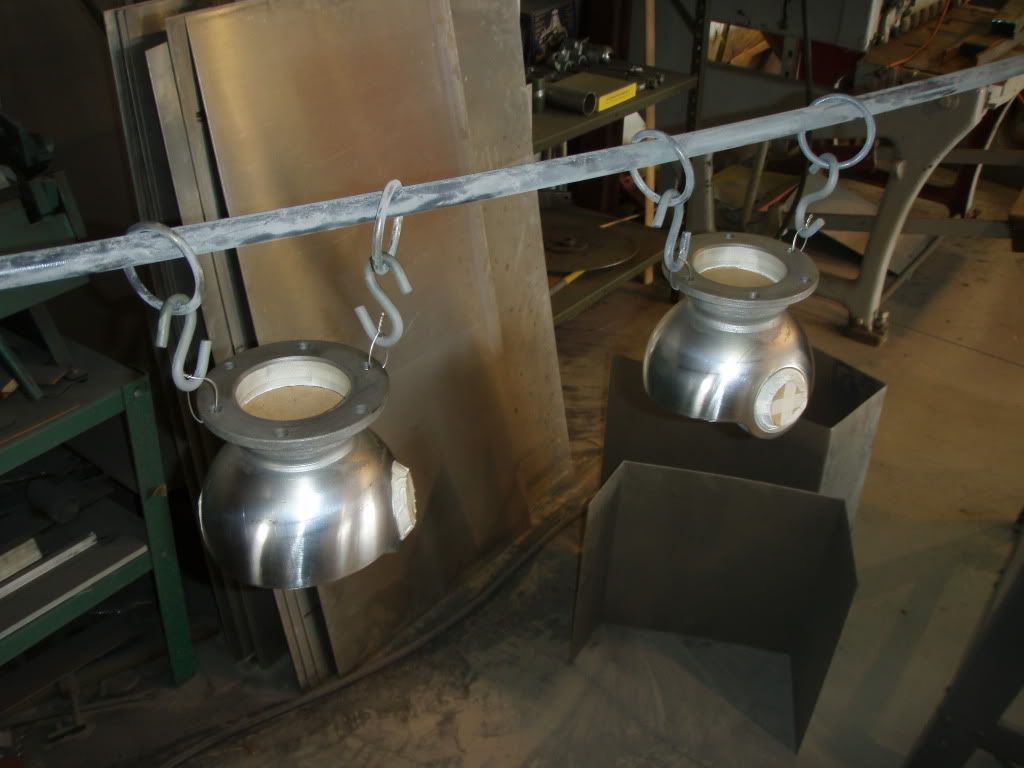
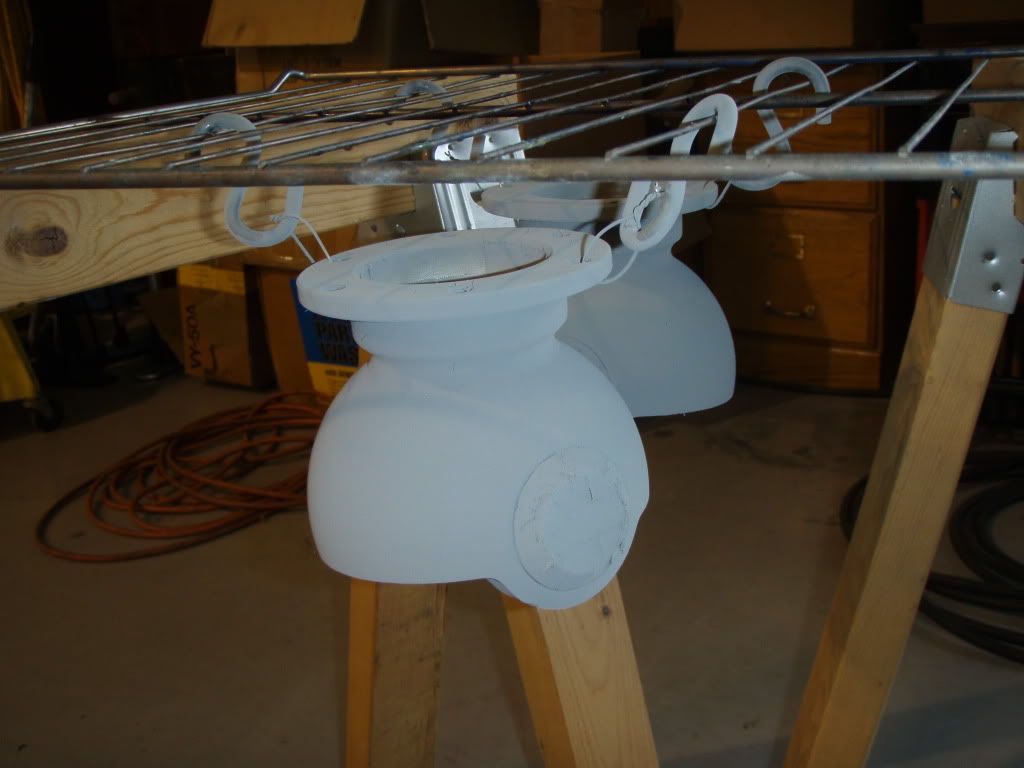
Well, i cleaned them (so i thought) in my parts washer and let dry for couple days while i did other stuff then gave them a quick bead blast but stayed away from the shiny smooth parts. Cleaned again in parts washer, rinsed with hot water and let dry. If i did it over again i would have pressed out the bearings but at the time i had no idea what i was really doing...this is where the oil hid. All seemed great, taped everything off very well with hi temp fancy stuff and applied powder that went on excellent. I hung them in the oven with flange side facing up. As with many of the parts i did, i put powder on the face of the flange that ended up being too thick to reassemble. I spaced out that i need that machined surface for later when taping it, so i had to strip it off. No big deal...
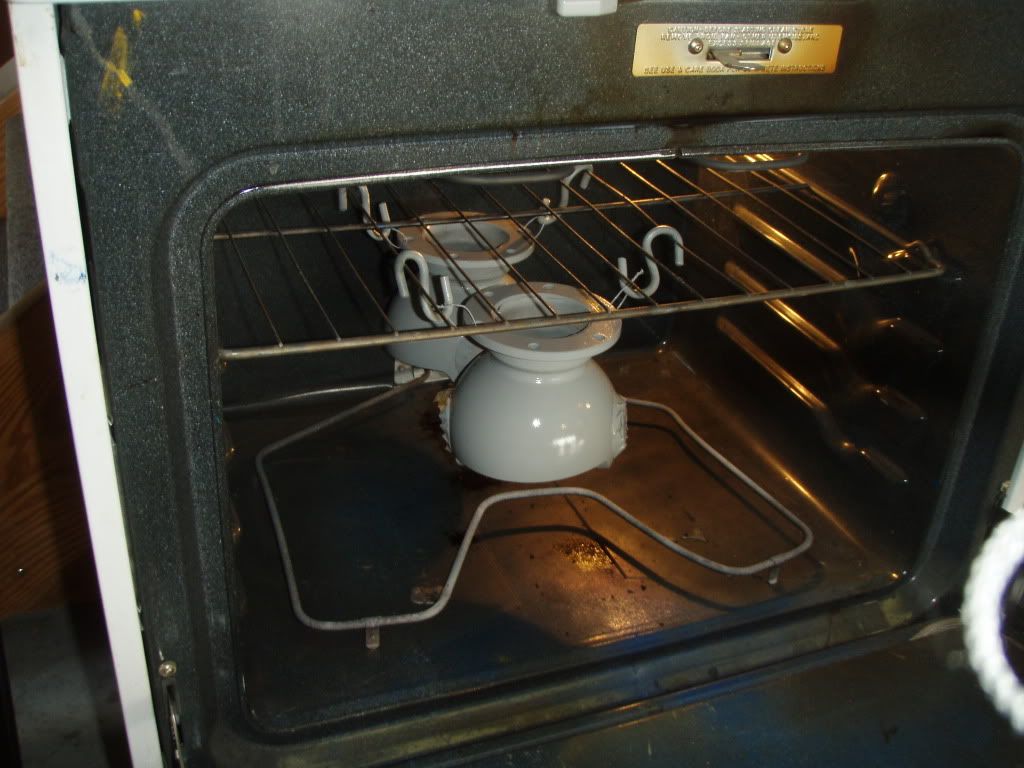
To the point...About 5 minutes into baking @400 from all the way across the hangar i started to smell burning oil, i look over and it seemed like the oven was on fire. Ran over opened the door to oil drips running down my powder on to the oven floor and burning. After inspecting them it looked like all the trapped oil had oozed out so i continued with some pretty good smoking for the 20-25 min time required to bake. The only thing that happened was a streak of burned oil, so i made out pretty well (unlike my oil cooler fumble)
Where i went wrong was not pre baking the swivels. For a perfect PC job one must clean the part very well and make sure its rust free. Preheat oven to 450 then bake part for 20-30 min to cook out the junk (i was shocked to see how well crap can hide in many different parts). After a while the smoking didnt bother me, i figured what ever drips out will burn off eventually, just make sure you have good air flow! Remove part and turn oven down to 400 degrees. While still hot apply powder to the part. This way it begins to melt the powder onto the part right away and you get a very good idea of how well you are covering. Carefully hang parts on rack and place in oven, set timer for 20 min (depends on specific powder but 20 min @400 is pretty standard. The rule of thumb is once the powder looks "wet", start the timer. For some parts that are cast iron for example will take longer to get hot so thats why pre baking is recommended). Dont overcook your parts! or the finish will become dull and uneven looking (my rear driveshaft). Once timer is done carefully remove part and hang to cool. Take caution during this time as the PC is still gooey and if you bump something (ask me how many times this happend) it will scrape the PC right off. Think of this as melting plastic that becomes paint...sort of.
For some parts, having a dull or matte finish is cool. One time i ran out of satin black and only had hi gloss and by chance i found out a neat trick. To make hi gloss PC have a satin finish all you do is remove the part from the oven after the regular cooking process and immediately place in a cold place. For me i walked 5 feet and hung stuff outside on a rack (mid winter 30's) within a few min you can notice the finish become fully and evenly satin. I thought that was pretty cool, not intended but cool. The other way is to overcook but you wont get an even finish like chilling it.
I probably just rambled on but had a great experience with powder coat and love passing it on when ever i can. Hope that helped a little.
1970 Series IIA 109 EX-MOD
1971 Series IIA 109 EX-MOD
1982 Mercedes 300TD
1989 RRC
1993 D110
1994 RRC LWB
1995 RRC SWB Brooklands Edition
1995 RRC LWB
1995 RRC LWB
1995 Disco
1996 GMC 2500 Suburban
1996 Disco
1997 Disco
2001 RR P38
2005 LR3 HSE
2006 RR HSE
Low Range
Masonater - that's great information, thanks for sharing! One thing I haven't been able to find about powder coating is the coverage to amount of powder needed. Say for powder coating a rim, how many pounds/ounces of powder would be needed to coat it?
~Neil
1974 Series III 88
1955 Chevy 3200 truck
 Posting Permissions

 Reply With Quote