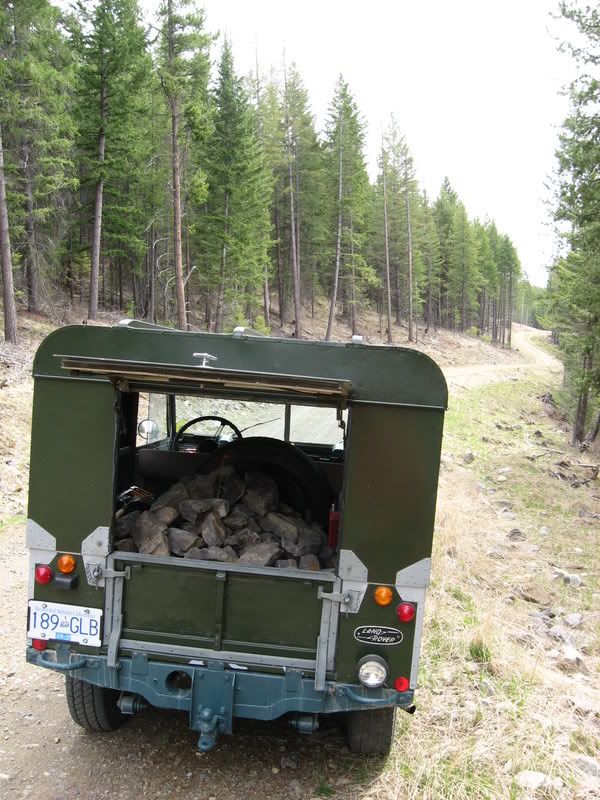
Work lamp install

Collapse
X
 
  • Time
  • Show
Clear All
new posts
  • jrd51ox
    1st Gear
    • Mar 2009
    • 112

    Work lamp install

    Just ordered a rear work lamp for my SIII from our host. First, does anyone have install tips or pics from past projects? *(hiding wires, switch locations, etc.)

    Also, I still haven't decided on a location. Suggestions or pics are welcomed.

    *Mine is an 88 hardtop.

    Thanks everyone.
    Last edited by jrd51ox; 12-03-2009, 11:25 AM.
  • scott
    Overdrive
    • Oct 2006
    • 1226

    #2
    if i had a hardtop i'd mount it above the rear door opposit the hinge side. that way you could point it into the tub when the door was openned to light up your tool box for those late night road repairs
    '64 Series IIA 88 Canvas Tilt
    '68 Series IIA RHD Ambulance
    '76 Spitfire 1500
    '07 LR3 (Series Recovery Vehicle)

    Comment

    • Myron
      Low Range
      • Dec 2006
      • 95

      #3
      I recently put mine on the right side of the car. I'd rather it was on the left, but then it would have fouled on the roof rack ladder. I ran the power lead to the dome light, and the ground straight down the corner of the roof (inside) to the tail lamp ground terminal. I've seen many other installations with the lamp in the center of the roof.

      Myron

      Comment

      • Dav1550
        Low Range
        • Oct 2006
        • 80

        #4
        Copied an install of ECR and made up a new bracket & spacer that fits under the rear door upper hinge. Saved from having to drill any holes and additionally position allowed for running the wire between the top and window side then down along the inside rear door frame over to the right interior light cover. From there the wires follow the wiring harness through the chassis to a relay mounted on the inside right wing and into the centre dash with a toggle switch & indicator light.


        Comment

        • ArlowCT
          2nd Gear
          • Jul 2008
          • 238

          #5
          If you do any off-roading be careful on how high you mount it. I had mine mounted to the left side above the door, it was nicely protected with the roof rack at that point. First time I went into the woods without the rack I ended up ripping the light right off the truck with a branch that cleared the roof but then snagged the handle on the top of the light. Real quick way to bust a real nice expensive light.

          I now have two smaller lights mounted just below the body cappings to the lleft and right of the rear door. Wires run right into the compartments that hide the wiring for the rear lights. One nice thing about it not being up high is they don't shine right in your face as you walk up to the back of the truck.

          Cheers.

          Comment

          • gudjeon
            5th Gear
            • Oct 2006
            • 613

            #6
            Mounted mine low just above a grab bar. Protected somewhat down there. The mounting stud is the same size as the back tub mounting bolts. Wired to a 20 amp rated lighted toggle on the dash. Cheap and cheerful.

            Comment

            • kevkon
              3rd Gear
              • Aug 2009
              • 364

              #7
              I'm surprised no mentioned mounting it under the hood
              94 D-90 tdi
              72 Series III

              Comment

              • jb_
                Low Range
                • Nov 2008
                • 47

                #8
                Originally posted by kevkon
                I'm surprised no mentioned mounting it under the hood
                Or underneath so that you can admire the drips at night. LOL.

                Real men love drips.
                '74 Series III 109" RHD
                The Chaffcutter (choof choof phut phut)

                Comment

                • NickDawson
                  5th Gear
                  • Apr 2009
                  • 707

                  #9
                  The PO installed mine in the hard top (which leaves me ligh-less when I'm running the soft top)
                  The wires run along the inside 'gutter' and down the side of the windscreen. There is a switch on the back of the light itself. I have it wired to a fuse that is switched by the ignition.

                  Comment

                  • Nium
                    4th Gear
                    • Aug 2009
                    • 400

                    #10
                    Nick,
                    Your spare is on the wrong end.
                    Walker
                    1968 Series IIA-"Ronnie"
                    88" SW, 2.25L Petrol, LHD

                    Comment

                    • siiirhd88
                      3rd Gear
                      • Oct 2006
                      • 371

                      #11
                      I mounted my work light on my soft top 109 on a bracket above (and behind) the license plate lamp. I bought the bracket from our host, but one could be easily made from aluminum or steel angle. The work light is actually a cheap halogen fog lamp, and is wired via a relay to an 'on-off-on' toggle switch and indicating light. In one position the work lamp and indicating light are lit, in the other position the work lamp comes on with the reverse lamps when shifted into reverse. The toggle switch is actually a Lucas turn signal switch from a Bugeye Sprite, and the indicating light is a blue high beam dash light from a '70s MG Midget.

                      Bob
                      '96 Disco SE7
                      '81 SIII 109
                      '75 SIII 88 V8
                      '68 SIIA 109 V8
                      Last edited by siiirhd88; 12-21-2009, 08:47 PM.

                      Comment

                      • jb_
                        Low Range
                        • Nov 2008
                        • 47

                        #12
                        Originally posted by Nium
                        Nick,
                        Your spare is on the wrong end.
                        My spare is in the middle. Is that a problem?

                        It is on the right. Maybe left hand corners are more difficult now?

                        I figured that the new retread tyre would be better inside. All the rest of the rubber bits on my Series are seriously degraded in a Land Rover kind of way.

                        I need to buy a kit of all the rubber bits.
                        '74 Series III 109" RHD
                        The Chaffcutter (choof choof phut phut)

                        Comment

                        • NickDawson
                          5th Gear
                          • Apr 2009
                          • 707

                          #13
                          Originally posted by Nium
                          Nick,
                          Your spare is on the wrong end.
                          HA!

                          Funny enough, the truck drives sooo much more nicely since moving it from the middle. I have the 3rd henge, so far, it seems to work well. Haven't take it off road with the counter weight yet.

                          Comment

                          • bmohan55
                            4th Gear
                            • Sep 2008
                            • 435

                            #14
                            Originally posted by NickDawson
                            HA!

                            Funny enough, the truck drives sooo much more nicely since moving it from the middle. I have the 3rd henge, so far, it seems to work well. Haven't take it off road with the counter weight yet.

                            A 100lb+ tire on the hood is just the ticket for very steep hill climbs...as long as you don't mind guessing where the trail leads once you're up!
                            04 Disco, Gone-Disco died & so did mine
                            '72 S3 88 - Leakey & Squeaky

                            Comment

                            • jrd51ox
                              1st Gear
                              • Mar 2009
                              • 112

                              #15
                              Thanks everyone...some great ideas, I'm sure I'll stress over this little project until Saturday, then just start drilling.

                              Still not 100% sure how I'm doing this yet, but will post a pic once complete.

                              Comment

                              Working...