-
---------------------------
1961 Ser IIa Hybrid Defender
1969 Ser IIa Bugeye
1980 Ser III Lightweight 24V RHD- sold
1988 LR90 turbo diesel RHD - currently frame off rebuild in progress
1998 Disco - ex wife :-(
2000 Disco - RIP , end over end 2.5 times
2010 RR Sport Supercharged
http://mikerovers.shutterfly.com/ -
Although ingenious, I for one don't like the DMS. How else would I know when my truck is out of oil if not for someones virgin driveway being blessed before I leave?Comment
-
1958 107 SW - Sold to a better home
1965 109 SW - nearly running well
1966 88 SW - running but needing attention
1969 109 P-UP
http://www.facebook.com/album.php?ai...2&l=64cfe23aa2Comment
-
Good idea, though I'd rather see that oil on someone's driveway rather than what's collected in that pan spraying all over the underside of your great vehicle when wind is hitting it at speed. Wait. That makes your rover self-lubricating or something. Double fancy!Comment
-
Well, the beauty of the DMS is that it catches the drip and doesn't allow it to spray the rear suspension or get caught in the air stream and end up on the tailgate. Remember, we're only talking a few drips a week, and I'll occasionally wipe out the pan, so the DMS isn't going to fill up & overflow.Comment
-
Installed a new headliner
Over the weekend, I completed installing a new headliner in our 109's roof. It is comprised of 1/4 inch closed cell foam and marine hull liner.
Comment
-
That looks real nice.. Does it shed fibers?Comment
-
When I was back East last time I had to stop quickly cause an idiot in a Jeep started to turn into another road like I wasn't even there. I jammed on the brakes and the person then saw me and didn't continue turning. As I continued on I thought, that brake pedal went to close to the floor that time - which it had.
So now that I am back east again I had to replace a few brake lines. I decided to just replace sections instead of lines (after I had bought the lines of course) because the rear axle is looking a bit nasty and I know that I will be doing a bunch of work on that sooner rather than later and why replace a full brake line twice if I don't have to!
Kudos goes to Rovers North for excellent customer service when parts got shipped to the wrong coast at first!!1958 107 SW - Sold to a better home
1965 109 SW - nearly running well
1966 88 SW - running but needing attention
1969 109 P-UP
http://www.facebook.com/album.php?ai...2&l=64cfe23aa2Comment
-
trying to get the timing sorted out. uuuugh! 73 SIII swb 139 CI, rochester carb
working on:
rear bumper, window glazing, roll cage, paint top, etc... etc... etc....
http://jims73rover.blogspot.com/Comment
-
109 Headliner
 Me too. I followed the advice of the shop where I bought the materials and used the same contact adhesive that is used for laminate kitchen counters. Apparently the same stuff that is in the 3M spray cans but you can get a gallon of this stuff for the cost of one 3M can. I also used it to adhere the sound deadening material (1/8" closed cell foam with a limp mass vinyl layer) to the seat box. So I've placed my bets on it lasting for a long time!
As for TJR's question, no it does not shed fibers. You can pull some fibers out, but it takes effort. It is a very densely woven fabric--easier to cut with wire cutters than scissors.Comment
-
Little rattlecan fun while I wait for some wiring supplies to arrive. The St. Patrick's Cross is a bit off, but it looks pretty cool for having eyeballed it from a laptop screen sitting 5 feet away.Comment
-
Well, with a herculean effort, we managed to get most everything sorted last night, got the ol' 2.5 NA diesel fired up and I took the long suffering 88 on it's maiden voyage around the block. Initial observations are it is flippin noisy and friggin hot. Of course the floors and tunnel cover hadn't been refitted, so what else would you expect? Sure did seem to honk along nice though. Didn't get to really wind it out but I'm hoping for good things there. So far, about the best way to describe it would be... SWEET!
It was a fun process, but not without some minor drama along the way. The petrol engine came out without fuss, as they do. Prior to fitting, the diesel received a new timing belt, block heater and clutch.
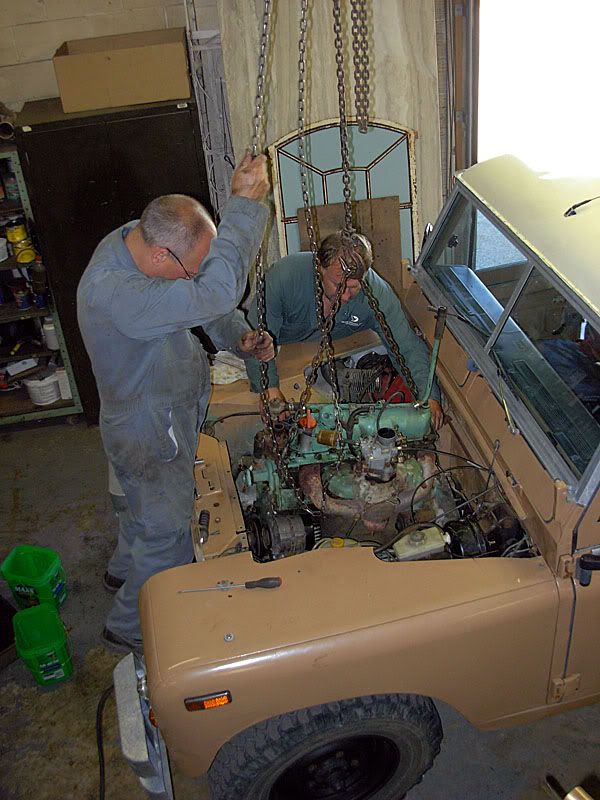
One of the legs for the battery tray needed to be removed and the right side engine mount cut off.
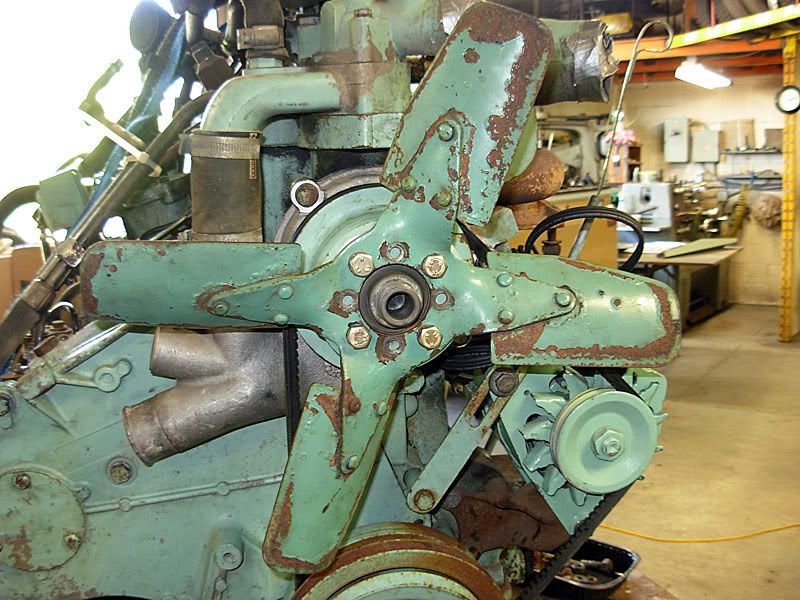
The viscous fan on the 2.5's stick out a bit too much and will foul the rad in the Series, so we modified the fan from the 2.25 petrol by drilling a centre hole for the viscous fan threaded bit to poke though, drilled four new bolt holes, swapped pulleys and bolted it all onto the diesel. Presto chango, no more interference.
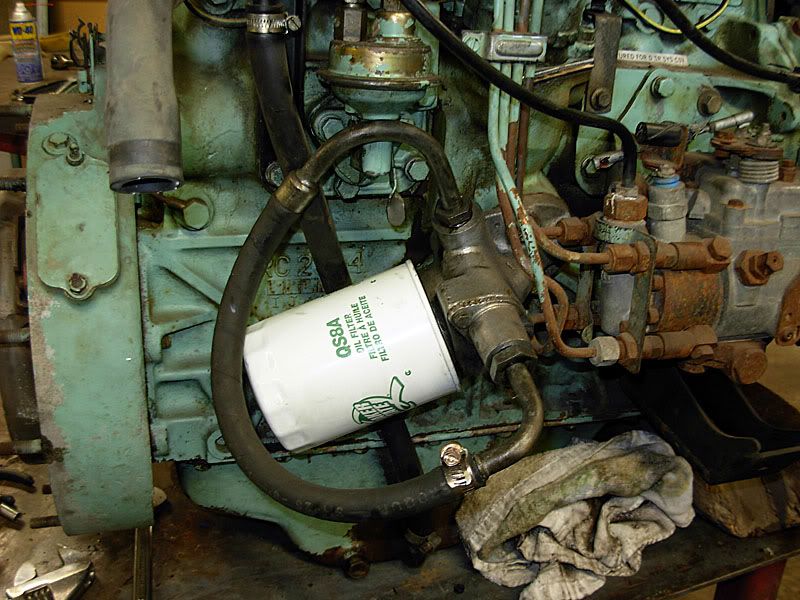
The lines for the oil cooler were cut and a short loop was made so that the engine could be run until I get some new correct lines made up.
The engine was lowered into the 88 and offered up to the gearbox. It took the appropriate use of cursing and swearing to get the engine and gearbox to mate up, but they finally succumbed to the foul language and we were able to bolt them together. The left side chassis mount was used and a new mount was made up for the right side.
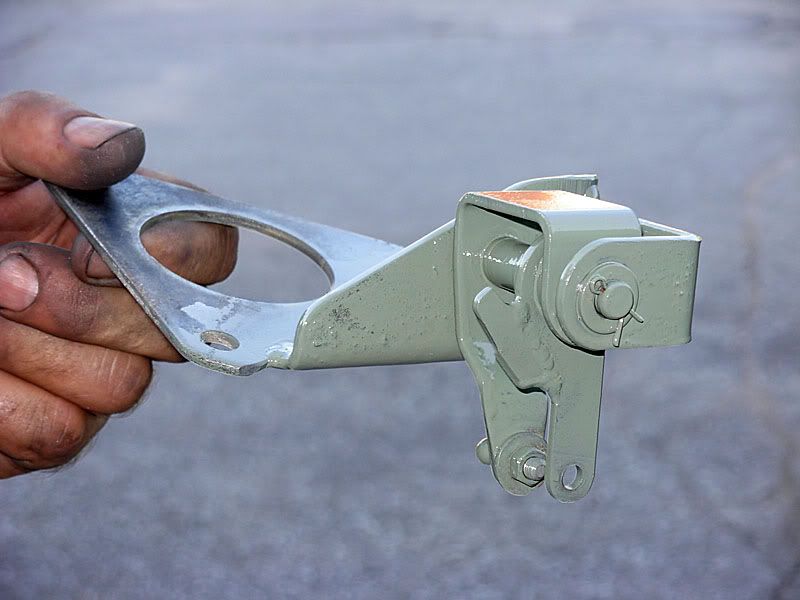
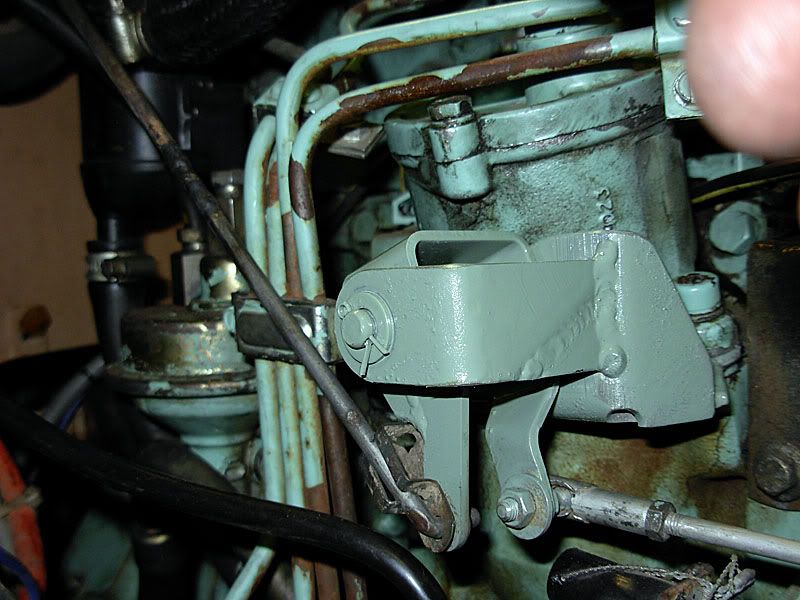
The 2.5 came out of my 110 and was originally operated by an accelerator cable. For the 88, we went with the Series mechanical accelerator bits so that I could retain my hand throttle. That and it seemed the easier way to go. The brackettry (?) was removed from beneath the vacuum pump, highly modified and replaced and the system seem to work slick as can be.
The rad was then reinstalled along with the shroud, and wouldn't you know it, the fan was centred just where it should be. Humph. Gotta like that.
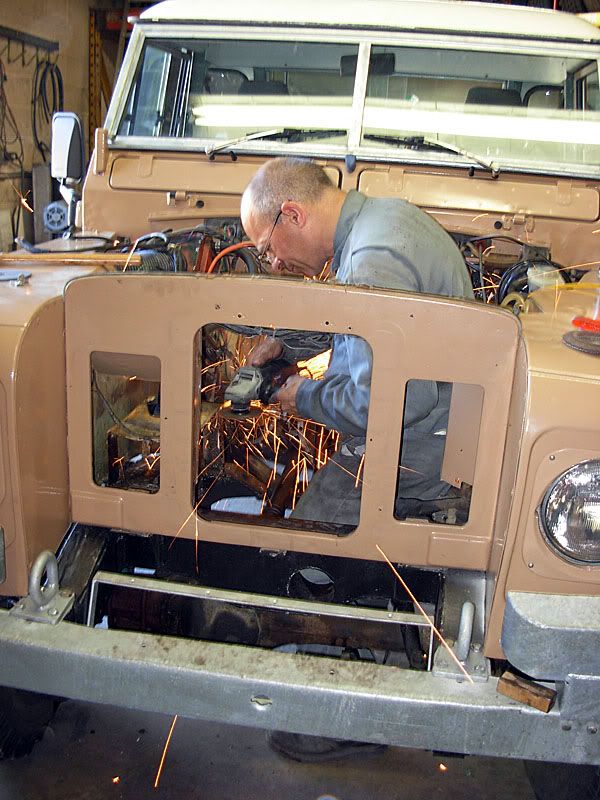
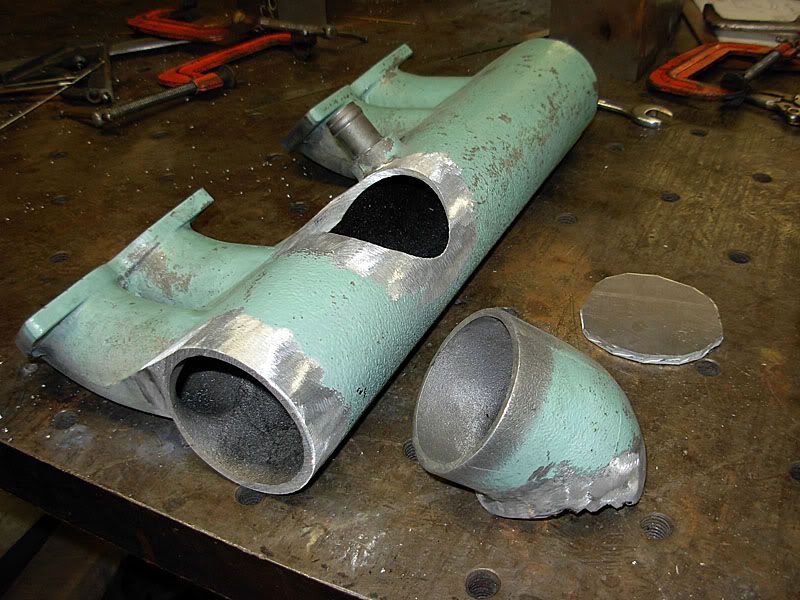
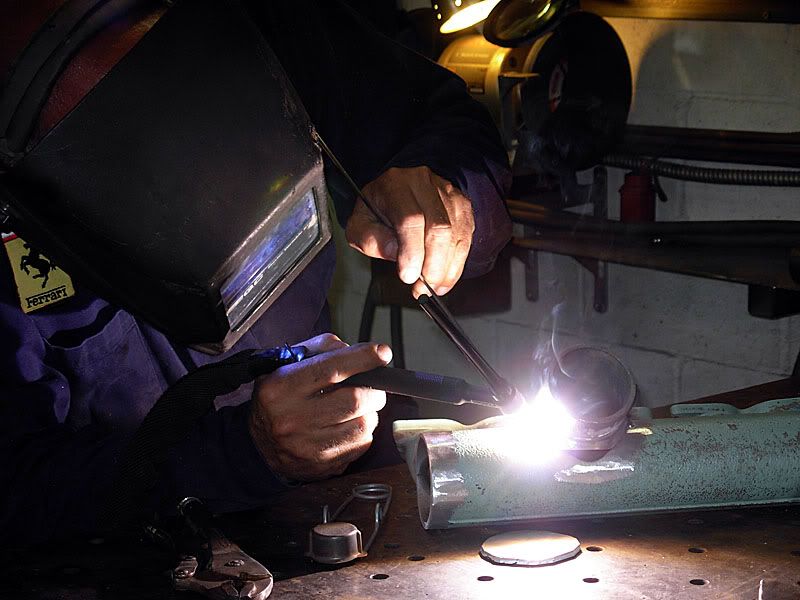
The opening for the air intake on the 2.5 NA actually faces away from where the filter sits in the Series trucks, so in a daring feet of ingenuity we cut off the opening bit, closed the hole and re-welded the opening on the top at the centre of the intake. With a small extension added to the oil bath filter canister, the intake hose from the 110 was a perfect fit.
About all that was left to do was swap in the fuel filter from the 110, run a fuel return line and fire her up.
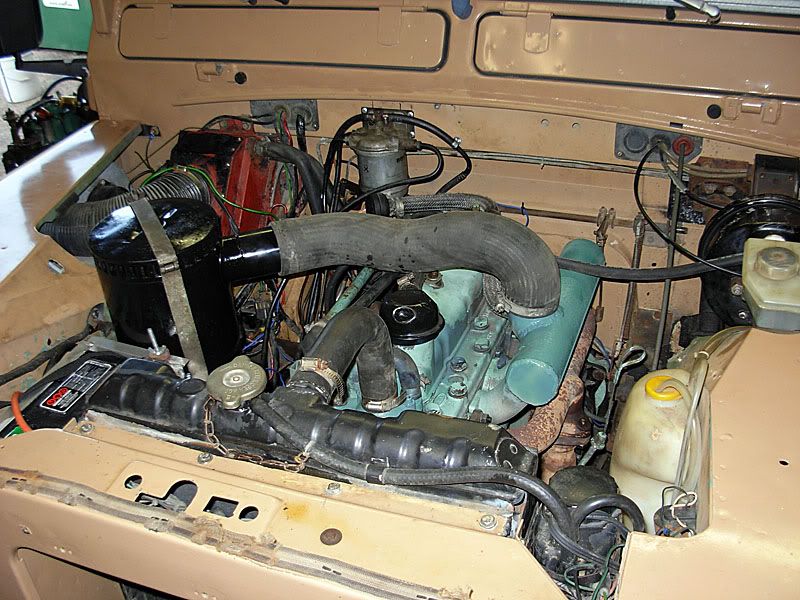
The truck is still at my buddies shop. I'll get out there one night next week for a bit of fine fettling and tidying up, then bring it home and start enjoying it all over again.
A big shout out to my buddies Tom, Dave and Geoff for all their help with this project. Tom is the one who did the welding and fabricating and I couldn't have done this without him. Also thanks to SafeAirOne, Jim-ME and junkyddog11 for answering all my questions.
BrettSeries 3 88 Diesel Soft Top
Ex-Mod 110 TdiComment

 Tweet
Tweet


Comment